Wednesday, April 18, 2007
Translation of Google Chinese Input Method —
This is a translation of the setup options and other configurations for Google's Pinyin Input Method Editor, or IME, which was originally released on April 4, 2007 (you can download it here). Please note that it's currently available only for Windows (I'm dying for the Linux version to come out), and you must have East Asian Language Support installed. I've also included a few tidbits here and there on using it. If you see any incorrect translations or any awkward wording, please let me know and I'll correct it. I hope this comes in handy for all non-native Chinese speakers who want to use this cool tool.
My original post was on April 18, 2007. I have thoroughly updated this post to accord with the latest version of this IME as of November 11, 2007 (1.0.23.40), and I will continue to update this post as my schedule allows with any new stuff Google adds.
As part of this post update, I've made the following changes:
To see tooltips on the screenshots, just move your mouse over any of the words. After a very slight delay, you should see a tooltip or mouseover with English or Chinese. The tooltips should appear on both Firefox and Internet Explorer.
Google IME Toolbar
The Google IME Toolbar is fairly standard — it has the same options as most other IME toolbars that I've seen, but it looks a lot nicer and cleaner.
Right-clicking almost anywhere on the toolbar will also bring up the Context menu. However, if you right-click on the keyboard, a list of the available virtual keyboards comes up (see below for more info).
The arrow on the right can be used to collapse the toolbar, and you can configure the toolbar to be small and transparent, so it's quite unobtrusive:
There is also a keyboard shortcut you can configure to make the toolbar appear and disappear. By default it's Ctrl + Shift + S.
Google IME Toolbar - Settings
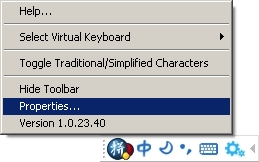
Selecting the gear, or right-clicking anywhere on the toolbar except the keyboard, brings up the following context menu:
Chinese | English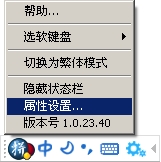
The options include:
To get to the IME Settings window, select 属性设置....
Google IME Settings - Pinyin Default Tab
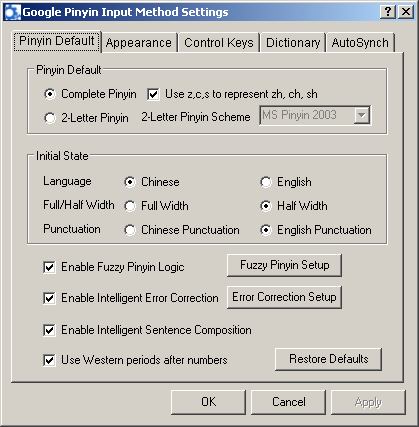
Here you can select what type of pinyin to use, the initial state of the IME, and configure some of the intelligence and fuzzy logic built into this tool.
There are two types of Pinyin methods, QuanPin (全拼), and ShuangPin (双拼). QuanPin would be easiest for students of Chinese, as it involves typing the full standard pinyin of a character or phrase.
You can also select a default typing language of Chinese or English, and there are several ways you can switch back and forth: via the toolbar, by pressing Shift or Ctrl alone (this option is set in the Control Keys tab), or by typing an initial 'v' then the English word ('v' within a word will likely be interpreted as a u with umlaut: ü).
Another option is full-width (全角) vs. half-width (半角) characters. This corresponds with the circle and crescent (or sun and moon) in the IME toolbar, and you can toggle this as well by hitting Shift + Spacebar. (This is a fairly easy key combination to accidentally hit. So if you've got the Google IME activated and you're typing away in English, and suddenly the font changes and gets wider, it's most likely because you accidentally hit Shift + Spacebar.) Full/half width influences spacing, but note that Chinese characters are always full-width, whereas alphanumeric characters and punctuation can be either, for example:
中国123ABC?!" - these were typed with the half-width option
中国123ABC?!" - these were typed with the full-width option
If Chinese punctuation is used, there are more changes than just periods and commas:this becomes this <> 《》 {} 『』 [] 【】 ` · ~ ~ $ ¥ ^ …… * × _ —— \ 、
There doesn't seem to be any way to get the 「」 combination. Also, both forward and backward slash keys can be used for the Chinese repetition comma, the 顿号 (、). If full-width characters are selected, however, only the backward slash (\) will work for this.
Thanks to edwin for shedding light on the bottom option, 数字后的句号自动转换为标点. It means, not quite so literally, "Use a Western period (.) after a number, not a Chinese period (。)" So if you're typing away with Chinese punctuation, and then you make a numbered list, it'll come out like 1. 2. 3. not 1。 2。 3。 Incidentally, you can toggle between English and Chinese punctuation by pressing Ctrl + Period.
Chinese | English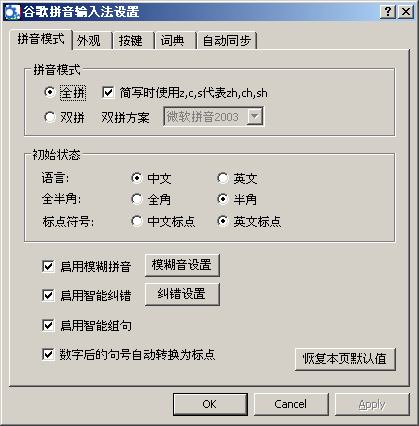
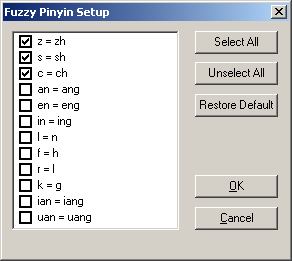
Clicking 模糊音设置 opens the following pop-up. This reflects some common variants in standard Chinese pronunciation that could lead to inexact pinyin spelling; for instance, in Sichuan z, c, and s are frequently used where standard putonghua would have zh, ch, and sh, and I once had a Chinese teacher from Sichuan who sometimes spelled zhè (这) as zè. I'm not sure if there's any difference between selecting the first three options here, and selecting the option on the Pinyin Default tab, "Use z,c,s to represent zh, ch, sh."
Chinese | English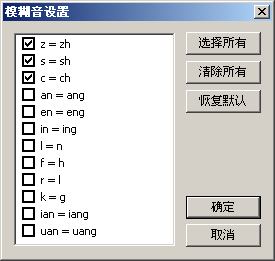
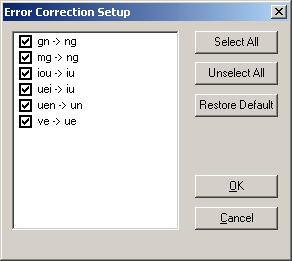
Clicking 纠错设置 opens the following. These correct certain misspellings and commonly transposed letters.
Chinese | English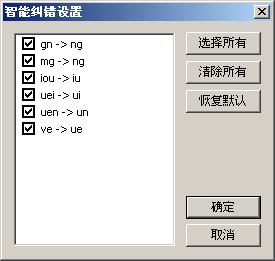
Google IME Settings - Appearance Tab
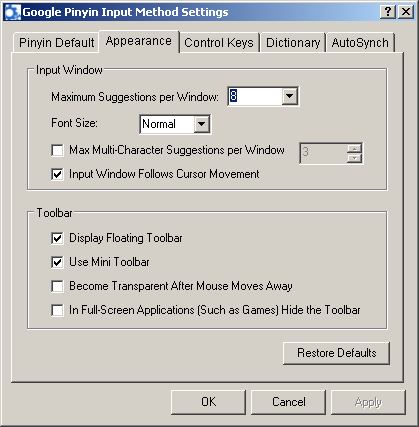
Here you can configure the input window or input frame, and the toolbar. The font size selected here only affects the size within the input window itself.
For those who don't like the toolbar, it can be disabled in this tab. Note that if the toolbar is disabled and you ever need to modify the Settings, you can:
Chinese | English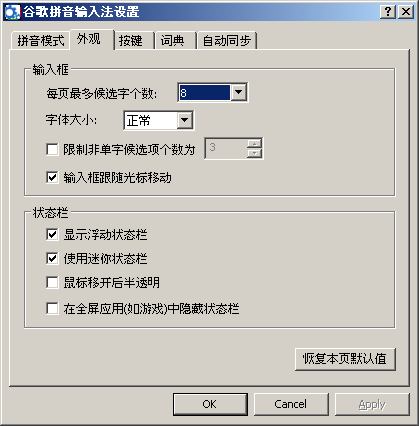
Google IME Settings - Control Keys Tab
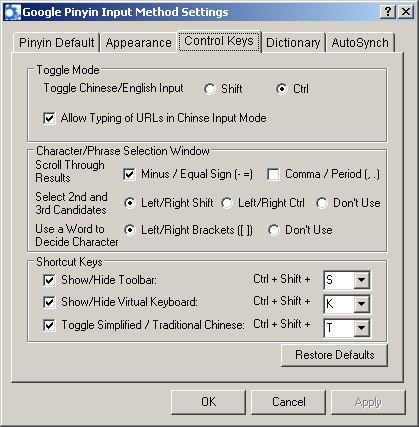
When the Google IME is activated, you can quickly toggle between English and Chinese by hitting Shift or Ctrl, depending on what is configured here. If you're trying to type in English and suddenly realize you're in Chinese language mode, just hit whichever button you choose in this tab. As long as you haven't hit the spacebar yet, you'll end up with whatever letters you've typed so far.
The typing of URLs option only works if they begin with http:, https:, and www. If you try starting an address with just a subdomain, like tools.google.com, it won't work.
There are some interesting ways here to manipulate the character suggestions when typing in Chinese. If you need to scroll through the results and you don't want to use Page Up or Page Down, you can configure the combinations of minus/equal sign or comma/period to do so.
Ideally, what you're trying to type should appear in the first position, and you can just hit the spacebar or a punctuation key and move on. However, if the character result you want is 2nd or 3rd, you can still fairly easily select it by using left or right Shift, or left or right Ctrl. It's probably a good idea to select a different key than what you use to toggle Chinese/English input mode.
The 以词定字 option is a very useful one. Let's say you just want the character 意. You would type "yi," and of course there are about 60 Chinese characters that are pronounced "yi." Without this option, you'd either have to scroll through the results, or you'd have to keep typing to get a word that has 意 in it (such as yìyì - 意义), and then delete the extraneous character(s). With this option, you can just type "yiyi[", and you'll just get 意. It's basically a way to say, "I want the 意 from 意义."
The shortcut keys at the bottom are self-explanatory, but I'll just mention that if you make the toolbar disappear, the only way to get it back is by clicking Ctrl + Shift + S, or whatever is configured here, even if you exit the IME completely and go back in.
Some "Control Keys" which are not configurable hence not shown here:
Chinese | English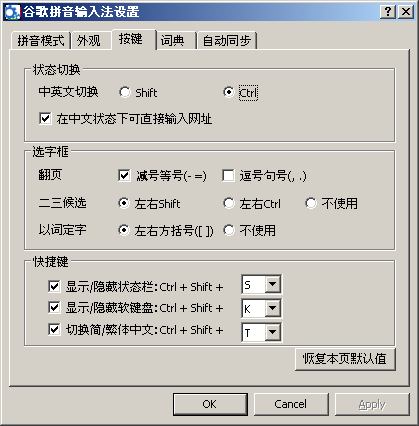
Google IME Settings - Dictionary Tab
The "dictionary" referred to here is essentially the set of characters that you have typed. This is reflected in the first option here, which will keep track of what you type and adjust future character suggestions accordingly. In other words, if you type "zhao", the character 朝 is not listed among the first set of results, and you have to scroll to get it. If you select 朝, the next time you type "zhao" it will be listed earlier in the search results. If you select it often enough, it will show up as the first result (it looks like if you select a character six times in a row it will show up first).
I don't know enough about character encoding to say much about the second option here, "Use GBK Character Set," but GBK is essentially an extended character set that contains characters not available in other, older sets. You can read more about it here.
Chinese | English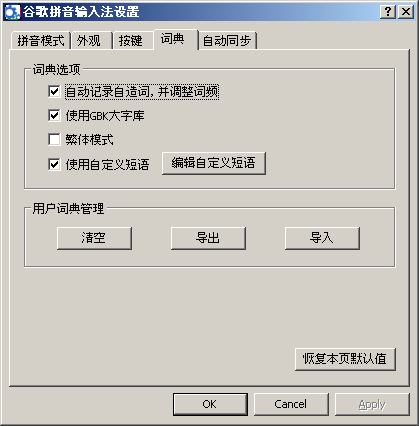
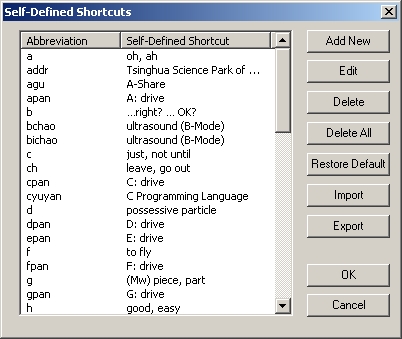
Clicking on 编辑自定义短语 opens the following. Self-defined shortcuts may not be particularly useful to students of Chinese if you want to make sure you always remember the full, correct pinyin spelling of characters and phrases. But there's no reason to always fully type the most basic of phrases, such as 'yígè' to get 一个. Just hit 'y' and 'g'. The default list of shortcuts is translated in full in the outline I put together in Google Docs.
Chinese | English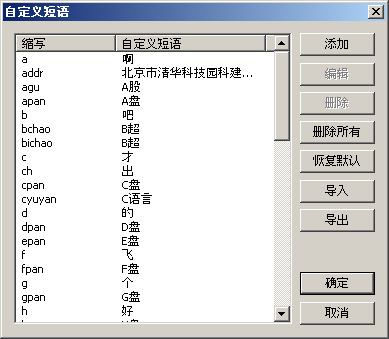
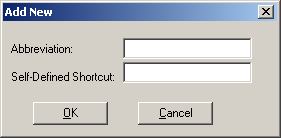
Clicking on 添加 opens the following:
Chinese | English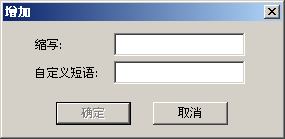
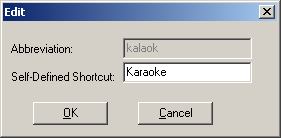
Selecting a shortcut and clicking on 编辑 opens the following pop-up. As of a recent release, it seems you can no longer modify the abbreviation part, but just the result.
Chinese | English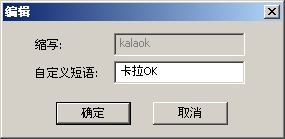
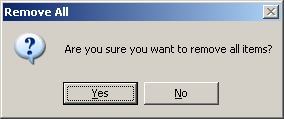
Selecting 册除所有 opens the following:
Chinese | English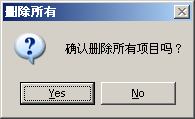
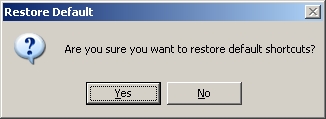
Selecting 恢复黙认 opens the following pop-up, and if you click Yes it will remove any custom shortcuts you had added.
Chinese | English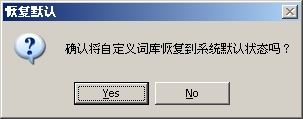
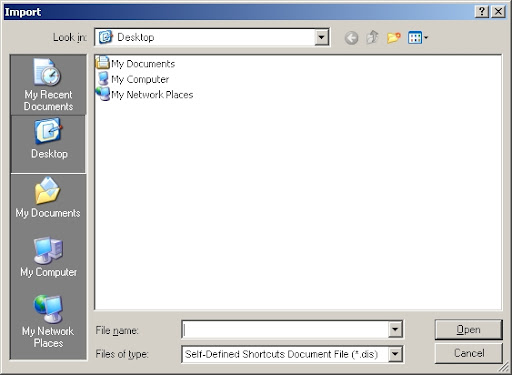
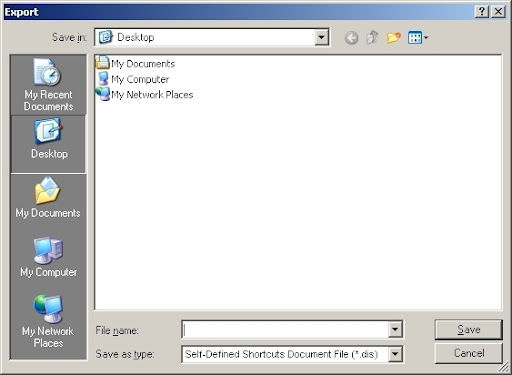
You now have the option of importing and exporting the self-defined shortcuts. The imported/exported file will be a self-defined shortcut file with a .dis extension. Each line in the file contains the abbreviation and the shortcut separated by a tab, and these files are encoded in ANSI format, so the easiest way to view them would be to open it up in Firefox and select Chinese character encoding, or to open them in Word (where you'll also have to select Chinese character encoding).
Chinese | English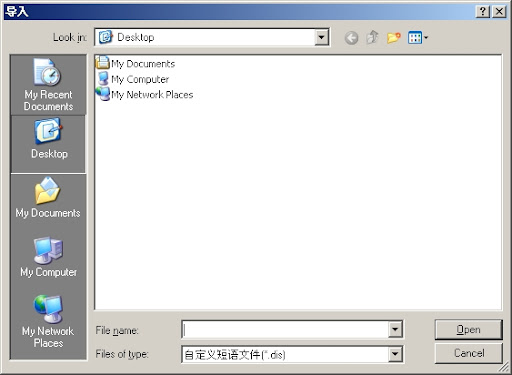
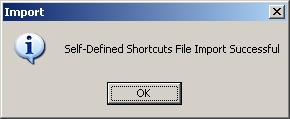
If the .dis import is successful, the following message will be displayed:
Chinese | English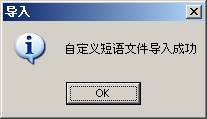
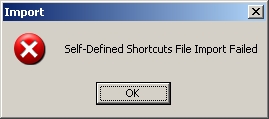
If it's not (for instance, if you try importing a file encoded in Unicode or UTF-8 format), then the following message will be displayed:
Chinese | English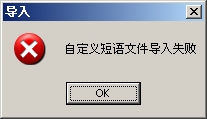
Chinese | English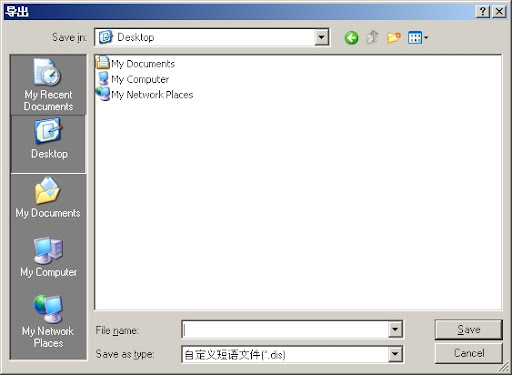
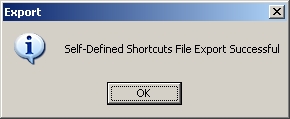
If the .dis export is successful, the following message will be displayed:
Chinese | English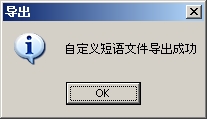
Back to the Dictionary tab, in the User Dictionary Administration section, selecting 清空 opens the following:
Chinese | English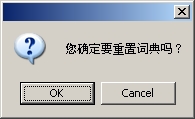
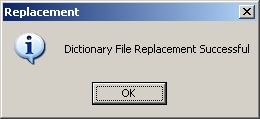
If you decide to clear/reset the dictionary, the following confirmation message will appear after it's cleared:
Chinese | English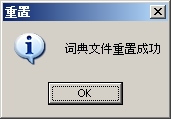
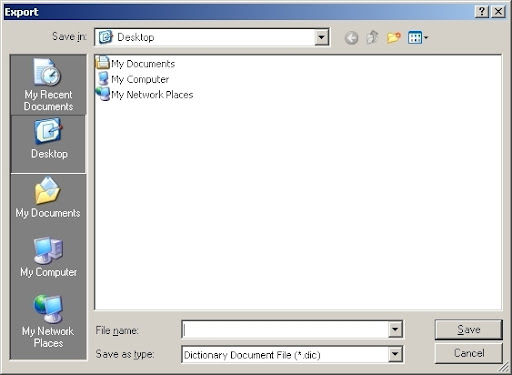
The dictionary can be exported to a .dic file (again, the "dictionary" is the set of characters that you have typed). Each row in the .dic file has the character or phrase, the number of times that it was chosen, and then the pinyin that was typed to get it, all separated by tabs. Again, the file is in ANSI format.
Chinese | English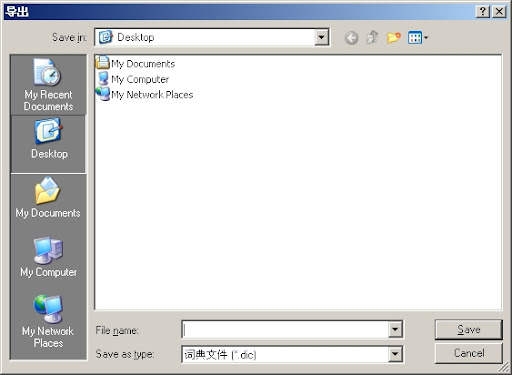
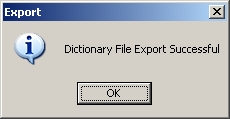
If the export was successful, you'll see this pop-up:
Chinese | English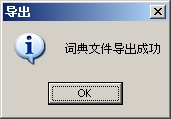
There may be a message for a failed export, but I was unable to get one.
Chinese | English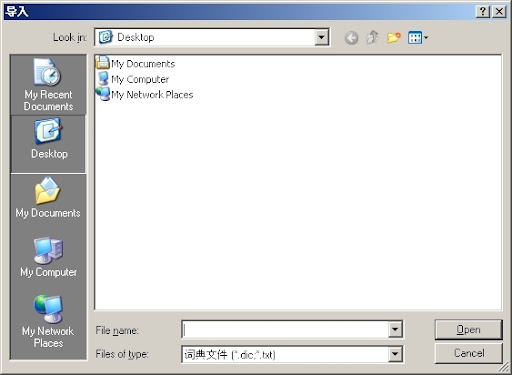
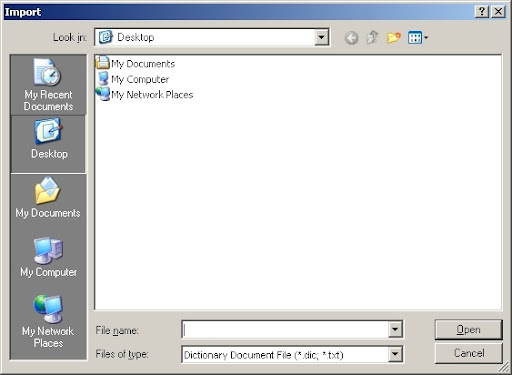
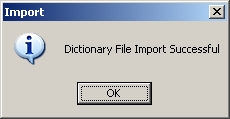
When importing a .dic file, this message will be displayed if the import was successful:
Chinese | English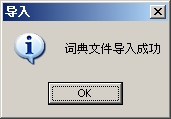
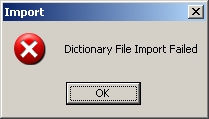
And this message if the import failed (which will occur if the file is not ANSI-encoded, for instance):
Chinese | English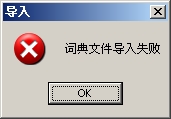
Google IME Settings - Autosynchronization Tab
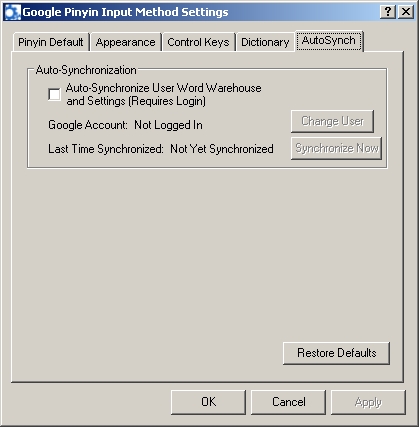
This tab allows you to sign in with your Google account, so no matter where you are when you type Chinese, the tool will adjust character frequency and make other intelligent adjustments based on what you've cumulatively typed in the past. (Google IME will also make judgements based on the millions of entries in its databases.) If you sign in, the tool will also remember all your settings, as well. To sign in you must select the 自动同步用户词库和设置 checkbox. You can change the user ID by selecting 更改用户, and you can sign out by unchecking the 自动同步用户词库和设置 checkbox or by clicking 恢复本页黙认值.
Chinese | English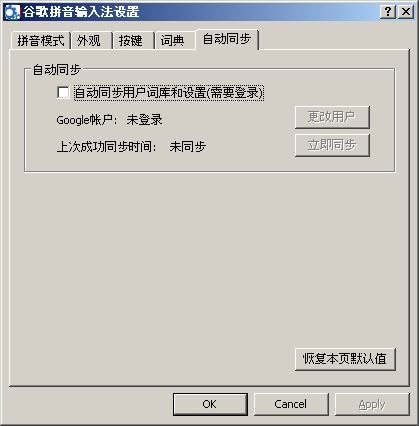
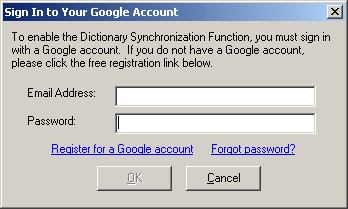
To sign in, click on the 自动同步用户词库和设置 checkbox, and enter your Google account username and password in the following pop-up box:
Chinese | English
If you click 更改用户, the same sign-in prompt appears.
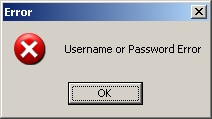
If the username and/or password are incorrect, the following message will appear:
Chinese | English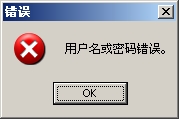
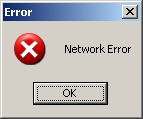
If you try signing in while your network connection is off, you'll get this error message:
Chinese | English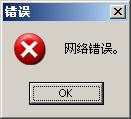
You might also get the above error message if you're already signed-in and your network connection gets turned off, as it appears Google will try to autosave every now and then if you're signed in.
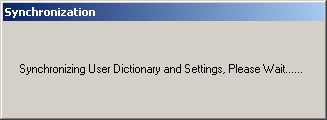
Selecting 立即同步 will first open this:
Chinese | English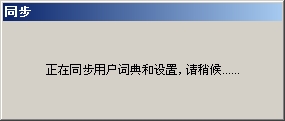
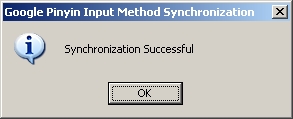
...and then this if it's successful:
Chinese | English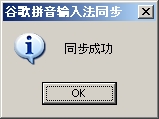
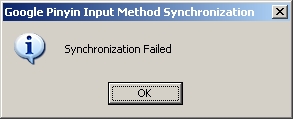
or this if it's not:
Chinese | English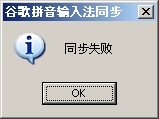
Google IME Toolbar - Virtual Keyboards
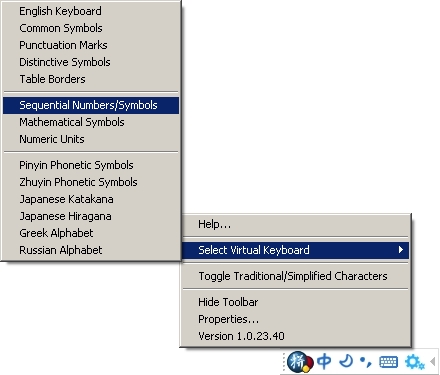
If you select one of these virtual keyboards, a keyboard will appear on your screen. You can either click the keys with your mouse, or just type like normal, and it'll send the characters displayed on the virtual keyboard, rather than what your physical keyboard has. Click on the keyboard icon on the toolbar to toggle between using a virtual keyboard and your physical keyboard. You can also toggle by going through the context menu to check/uncheck a keyboard, or simply hit Ctrl + Shift + K. If you right-click on the keyboard icon on the toolbar, a context menu with just the keyboards will appear.
Probably the most useful keyboard for students of Chinese would be the Pinyin keyboard: 拼音符号.
Chinese | English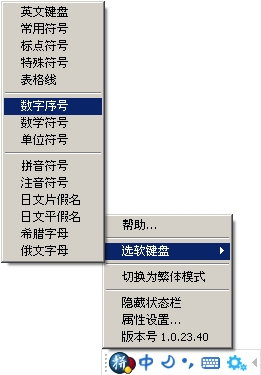
Google IME Input Window
The Input Window allows you to do a Google search on any highlighted character or phrase. To highlight a character/phrase, right-click it, or click the Up/Down arrow keys on your keyboard. You can right-click anywhere in the Input Window to get the Settings context menu (the same as if you clicked the gear on the toolbar). If you change any properties and close the Google settings pop-up box, it'll go right back to the Input Window, and whatever you had typed previously will still be there. (If you change from simplified to traditional characters, or vice versa, it won't change the characters in the selection unless you type a little more. E.g., if you type "tai wan", change the settings to traditional, and then continue by adding "dao", you'll get 臺灣島.)
You can hold down the left mouse button to drag the Window anywhere on the screen.
Chinese | English
The Left/Right arrows move the cursor between letters already typed. This is useful when typing phrases, and you need to go back to a particular part of the phrase and select a different character than what the IME chose. This allows you to do so without having to delete or re-type anything. Also useful if you spelled something wrong, or if you need to delete part of a phrase.
The Page Up/Page Down keys are used to scroll through the result sets (3-9 per window, depending on your configuration). They function the same as the arrow buttons within the input frame. The Tab key also scrolls through the results. The Home/End keys move the cursor to the beginning or the end of what you've typed already, and also highlight the first result.
To choose the highlighted character(s), select Space, almost any punctuation mark, or the number of the selection. If you click Enter, you'll just get the English letters you typed, and not any Chinese. You can also left-click the character(s) to choose it. The max number of characters you can type at a time is 64.
Use an apostrophe to separate letters where separation is ambiguous, e.g., xi'an, and for the u with an umlaut (ü), type v: nv will result in 女.
One final note I'll mention: Google's Pinyin IME also has a stroke input method as well, similar to the Wubihua method. To utilize this, type the letter 'u', then the following keys for certain types of strokes:key stroke stroke name h 一 横 s 丨 竖 p 丿 撇 n 乀 捺 z 乙 折 d 丶 点
Thus, if you'd like to get the Goo in Google in Chinese, type "upnpnszh".


filed under: Chinese
Saturday, February 24, 2007
Dust Storm —
So I drifted into a nice nap today around 1 pm, with clear skies outside and high winds. I awoke about 3 pm to the smell of dust, as if someone were changing a vacuum cleaner bag nearby. I also noticed a hazy light behind the blinds. At first I didn't connect the two. I stretched, went upstairs to get a book and, still smelling dust, peered out my bedroom window. Dust was everywhere, a thick yellow-orange fog covering the ground, blowing in from the barren Texas panhandle. I'd never seen anything like it before.
It was eerie being in that light. I couldn't help but think of nuclear winter and the fragility of our climate. I think I'll be making a donation to the National Arbor Day Foundation.
Fortunately the dust has pretty much blown away by now. Here's what it looked like in McKinney, about 20 minutes from where I live, courtesy of WeatherBug's Instacam: A crazy dust storm that blew through one Saturday afternoon.
filed under: observations
Sunday, February 04, 2007
Organicity —
For many years, I rarely ate apples. They simply didn't taste good to me. It was only in the last couple of years that I began eating apples more frequently, and I no longer have an aversion to them. What changed? I never really thought about that question, and definitely didn't have an answer, until Brian's mother lent me the Organic Cook's Bible, by Jeff Cox.
In the opening lines of the book, Cox describes the best apple he ever tasted. It was a blackish red, somewhat rare variety of apple that he bought at a small market. Cox goes on to discuss the only apple variety most of us are familiar with:The proliferation of the inferior Red Delicious is due to two primary marketing factors. First, the apples have deep red skins and consumer preference tests show that people associate a deep red apple with quality, even if, as with Red Delicious, there's precious little quality to the flavor. Second, they are called "delicious" even though they aren't.
As I read those lines, it dawned on me that for all these years, I had been avoiding not apples, but a single variety of apple, the variety which is usually the only one you can get. Then two years ago I moved next door to a Whole Foods, which has much more to offer than Red Delicious, and organic too. Thus my re-acquaintance with apples.
Here's a photo, by the way, of the type of apple that Cox had. Alas for "consumer preferences".
This story is not limited to apples. The food industry, like some Plato scared of variety, has long been on a quest to reduce food to these limited ideals. Red Delicious is "the" apple (or maybe Granny Smith). Black Beauty is "the" eggplant. White Button is "the" mushroom. And on throughout the food supply:Scientists have recorded over 15,000 plants that have been used by human beings as food over the millennia, but there are only about 150 commercially important food crops worldwide these days. And in the large corporate food systems that provide foods to our supermarkets and big commercial stores, only a few of these 150 commodities are typically available to the consumer.
And as is the case with apples, the chosen variety is frequently the inferior one. Cox, former editor of Organic Gardening, introduces us to the other varieties of vegetables, fruits, nuts and grains throughout the book, and while perusing his in-depth descriptions, I was struck by how little I know about the food I eat.
For instance, there is a variety of eggplant that actually looks like a white egg. Avocado flowers are the only flowers which change their sex. Black canned olives are actually green unripe olives soaked in lye. Pineapple juice can eat your skin. These are some of the more odd and intriguing facts among all the information about varieties, seasons, growing tips, and best regions to grow what—knowledge that has been lost in our age of standardized food available year round. Quick: what type of food grows best in the area you live in?
I don't know either, but this book makes me want to find out.Over centuries and sometimes millennia, local people had learned which crops and types of livestock thrived in their climate and on their soils. ...Cooking techniques and recipes were for centuries very region-specific, and over time cooks in those areas learned how to make the most palatable dishes from unique local products. ...The French call these site-specific flavors terroir, or soil, which is a succinct way to describe the phenomenon that each specific place on the earth will express itself in the taste of the food that grows there.
The food industry has been steadily trying to destroy terroir with inferior-tasting food, an arsenal of chemicals, and genetic-engineering. Terroir is the opposite of what most corporations are all about: standardization and monotony, also known as branding. That you can go from Beijing to Bangalore to Paris to New York, and in each place get Big Macs and Frappuccinos, is the corporate, anti-terroir wet dream.
Although the major food corporations have tried and will continue trying to water down organic food rules, it looks like the tide is turning somewhat with the growth of of the organic food movement in recent years. Cox has been involved in this movement since the beginning (in America), and the book is interspersed with 250 wonderful recipes that he's collected over the years, and with stories of the unique, delicious, and local food he's encountered in his travels across the country. Reading this book makes you hungry, but with a different sort of hunger. You want to stop at a rural fruit stand, you want to pick something in the wild, to find food at the right time and the right place—and savor those lucky moments which you can't get with conventional food. If you care about the environment and the food you eat, this book is definitely worth buying.
I must end with one last fact, this one about rabbits:Buck rabbits are either screamers or fainters. That is, after they mate with a doe, they either scream or faint. Just a point of interest.
Some relevant links:
http://www.slowfoodusa.org/
http://www.oldwayspt.org/
http://www.treesofantiquity.com/
http://www.localharvest.org/
http://www.gourmetsleuths.com/
filed under: corporate US, food
Map Your Travels, 2.0 —
UPDATE: 07-15-2007 - Blogger made some more minor feed changes which broke this hack. This was a modification to the summary category feed, and specifically it was a change in the order of the links available per entry. Previously link entry number 1 pointed to a summary version of the post. Now link number 1 points to the comments.
To correct this, in the function storeFeed I had to modify this line:
var link = entry['link'][1].href;
to this:
var link = entry['link'][2].href;
UPDATE: 06-11-2007 - Blogger apparently made some minor changes to their feeds recently which changed the ordering of some feed items and broke this hack. Specifically, there's a function storeFeed which had the following lines:
if (i==0) {
var category = entry['category'][0].term;
var index = mapLevels.indexOf(category);
}
The index variable was returning a value of -1, meaning it did not exist. To get this to work again, I had to change the category to entry['category'][1].term. I have updated the code below.
Shortly before implementing the Travel Map hack, I heard that Blogger began offering JSON versions of their feeds. Blogger had long offered Atom feeds, but those could not be utilized without a feed reader or aggregator, requiring a set up with non-Blogger applications if you wanted to use your own feeds in your own blog.
JSON changes all of that, and being able to use my own Blogger feeds in my blog, the Travel Map hack can be vastly simplified and improved. I put it off for a while, but due to some odd behavior in the first version, I worked on and now unveil version 2 with AJAJ.
Microsoft Internet Explorer still can't handle this feature (v6 or v7), so the "places I've been" link below my profile remains disabled if you're using IE. But if you want to watch IE crash, here's a live link. And again, if anyone knows the nonstandard MS-HTML I need to use to prevent IE from crashing, let me know.
The way the posts need to be composed has changed slightly from version 1:
Post Titles
All post titles must consist of: higher-level post name, this-level post name, latitude, longitude, zoom level, and H S or M map type (Hybrid, Satellite, or Map).
All of these values must separated by commas, no spaces. Examples:Map,world,35.704857,-6.926808,1,S
How does one get the latitude and longitude? The easiest way is to go to Google Maps, find the place you're looking for, and click on "Link to this page." You'll see the page reload, and in the address bar, you'll see part that goes "&ll=" followed by two numbers:
world,China,35.86166,104.195397,3,H
China,Great Wall,40.355595,116.009375,17,S
China,Wuhan,30.579997,114.269829,12,S
Wuhan,York Bar,30.589035,114.297032,18,S
This is the latitude and longitude, and you can copy them directly from there. Incidentally, the zoom level will be just before this, where it says "&z=".
For the world post, which is the introductory top-level post, the initial value in the title must be "Map", like so:Map,world,35.704857,-6.926808,1,S
Post Labels
Each post should have two labels. Every post should have the label, atravelmap. Then, each post should have another label depending on what level it's on: countrymap, regionmap, citymap, or placemap. The atravelmap label is used to group all these posts together. The other labels are there to help with sorting the posts into the right hierarchy.
The CSS will prevent these labels from appearing in the labels widget.
Post Date
Before you publish the post, you need to backdate it. Usually I save the post as a draft first, then change the date and publish it. With the code I have above, the posts should be backdated to 1985 (I just arbitrarily chose this year). The code will prevent this year from appearing in the Blog Archive widget.
Also, the code will prevent any of the posts from appearing via the "Older" link. Note: if you don't have very many posts currently, you may need to modify your Blog Settings (Formatting) to only display a certain number of posts on your home page. This will prevent the travel posts, with their funky titles, from appearing on your homepage.
You will need to play with the months and days a bit to get them to show up alphabetically.
I also disable comments for my travel posts, and the code I have does not allow for comments to even be displayed for these posts, but that could be fairly easily changed.
Post Body
The post body has no special requirements. However, if you want a marker or markers to appear for a location, you must include a span with an id of "markers" in your post body. Within the span tags, you should include the latitude, longitude, and name of each marker. Each marker can appear on a separate line, like so:<span id="markers">
Note: This assumes the Settings -> Formatting -> Convert line breaks is set to Yes. In other words, when you hit Enter when composing a post, it will be replaced with a single <br /> tag in your blog. If you have this setting on No, then the markers should be entered as follows:
39.930011,116.399975,Beijing
31.229999,121.470001,Shanghai
</span>Post text can begin here...
<span id="markers"><br />
39.930011,116.399975,Beijing<br />
31.229999,121.470001,Shanghai<br />
</span>Post text can begin here...
NEW! By request, you can now show routes, trails, or paths with some data included in your post body. For this functionality to work, you'll need to get a hex color, and two pieces of data from this Google utility. In particular, you will use this utility to draw your route, and then obtain the Encoded Polyline and the Encoded Levels that it generates.
In the body of your email, include this span:<span id="routes">
#FF0000,10,BBBBBBB,gutyDu~oxTzFgI|DiFhE}FxEiGjFaHjEeG
#3333cc,5,BBBBBB,{avyDmcqxTzVYaJaIpMkS`G}JgMaE
</span>Post text can begin here...
You can have multiple routes, one route per line (no carriage returns in the middle of the route data!). The first bit of data will be your hex color, which of course will be the color of the line on the map. The second bit is the line width (I'm not sure what the ranges are). The third bit of data is the Encoded Levels that you get from the Google utility mentioned above, and the fourth bit of data is the Encoded Polyline.
Note: This assumes the Settings -> Formatting -> Convert line breaks is set to Yes. In other words, when you hit Enter when composing a post, it will be replaced with a single <br /> tag in your blog. If you have this setting on No, then the markers should be entered as follows:<span id="routes"><br />
#FF0000,10,BBBBBBB,gutyDu~oxTzFgI|DiFhE}FxEiGjFaHjEeG<br />
#3333cc,5,BBBBBB,{avyDmcqxTzVYaJaIpMkS`G}JgMaE<br />
</span>Post text can begin here...
Also note that the Polylines are a little buggy. I noticed when I was experimenting with it that random markers would sometimes appear. You can see the one example (so far) on my map by clicking on China -> Wuhan -> Jianghan Road.
The code below has been updated to include this new functionality.
Here's how to add this functionality to your blog:
1. Go here to get a Google Maps API key for your blog. There's no limit on the number of URL's you can register for a key, so I'd highly recommend getting one for a test blog first.
2. Generate an animated loading graphic here, and download it to your machine.
3. Start a new post and upload the graphic you created in step 2. After it uploads, you'll see some HTML appear in your post. Copy the web address that is between the quotes where it says href="". Save this post as a draft (entitle it something like "Graphics"). The purpose of this post is only for allowing you to upload graphics, photos, etc for use on your blog, and should always remain in draft status.
4. In the Page Layout view, add three HTML/JavaScript widgets to your blog:
a. Map Control - put this in your sidebar. This widget will contain the links to the various map locations.
b. Google Map - put this one in the large main section, above the Blog Posts widget.
c. Map Link - put this wherever you want the link to your travel map to appear (probably somewhere near your profile widget).
5. Download your template, and open it in a text editor. Add the following to your style sheet between the tags: <b:skin><![CDATA[/* and ]]></b:skin> :
        li#atravelmap, li#worldmap, li#countrymap, li#regionmap, li#citymap, li#placemap {
            display:none;}

        a.worldmap:link, a.countrymap:link, a.regionmap:link, a.citymap:link {
            text-decoration:none; color:#3a80b4;}

        #worlddiv, #countrydiv, #regiondiv, #citydiv {
            margin-left: 5px;}

        #countrydiv li, #regiondiv li, #citydiv li {
            list-style-type:none; display:inline;}

        #placediv ul {
            margin-left:13px;}

        #placediv li {
            list-style-type: disc; text-align: left;}

        #markers {
            display:none;}

        #routes {
            display:none;}
6. Add the following scripts to the header element, between the tags: ]]></b:skin> and </head> :
<script type="text/javascript">
var priorEntry = "";
var count = 0;
var highlightCount = 0;
var mapLevels = new Array("worldmap","countrymap","regionmap","citymap","placemap");
var entryTitle = new Array();
var postFeedLink = new Array();
var postID = new Array();
function loadMapFeeds() {
priorEntry = "Map";
entryTitle.length = 0;
postFeedLink.length = 0;
postID.length = 0;
count = 1;
highlightCount = 0;
for (var i=0; i < mapLevels.length; i++) {
document.getElementById("contentdiv").innerHTML = "<img alt='Loading...' src='link-to-your-animated-loading-gif' />";
var divID = mapLevels[i].replace(/map/,"div");
document.getElementById(divID).innerHTML = "";
if (document.getElementById("catFeed" + i)) {
var scriptid = document.getElementById("catFeed" + i);
scriptid.parentNode.removeChild(scriptid);
}
entryTitle[i] = new Array();
postFeedLink[i] = new Array();
postID[i] = new Array();
var feed_load = document.createElement('script');
var url = "/feeds/posts/summary/-/"+mapLevels[i]+"?alt=json-in-script&callback=storeFeed&max-results=200";
feed_load.src = url;
feed_load.type = "text/javascript";
feed_load.id = "catFeed" + i;
document.getElementsByTagName('head')[0].appendChild(feed_load);
}
}
function storeFeed(root) {
var feed = root.feed;
for (var i = 0; i < feed.entry.length; i++) {
var entry = feed.entry[i];
if (i==0) {
var category = entry['category'][1].term;
var index = mapLevels.indexOf(category);
}
var title = entry.title.$t;
var link = entry['link'][2].href;
var post_id = entry.id.$t;
entryTitle[index].push(title);
postFeedLink[index].push(link);
postID[index].push(post_id);
if(i==(feed.entry.length-1)) {
count++
}
}
if (count==mapLevels.length) {
showTitles(0);
}
}
function showTitles(level) {
var html = ['<ul>'];
for (var i = 0; i < entryTitle[level].length; i++) {
var splitTitle = entryTitle[level][i].split(",");
if (splitTitle[0]==priorEntry) {
var aposTitle = splitTitle[1].replace(/'/,"apostrophe");
var nextEntry = '\"' +aposTitle+ '\"';
var t = getType(splitTitle[5]);
var link = postFeedLink[level][i].replace(/summary/,"full");
var quoteLink = '\"' + link + '\"';
var splitPostID = postID[level][i].split("-");
quotePostID = '\"' +splitPostID[2]+ '\"';
var category = '\"' + mapLevels[level] + '\"';
if (mapLevels[level]=="placemap") {
html.push("<li><a href='javascript:void(0);' onclick='javascript:showContent(",quoteLink,"); map.clearOverlays(); map.setCenter(new GLatLng(",splitTitle[2],",",splitTitle[3],"),",splitTitle[4],",",t,")'>", splitTitle[1], "</a>", "</li>");
}
else {
html.push(" <li><a class='",mapLevels[level],"' id='",splitPostID[2],"' href='javascript:void(0);' onMouseOver = 'javascript:highlightmap(" ,quotePostID, ")' onMouseOut='javascript:unhighlightmap(" ,quotePostID, ")' onclick='javascript:showContent(",quoteLink,"); showNext(",nextEntry,",",category,",",quotePostID,"); map.clearOverlays(); map.setCenter(new GLatLng(",splitTitle[2],",",splitTitle[3],"),",splitTitle[4],",",t,")'>", splitTitle[1], "</a>", "</li> ");
}
}
}
var whatdiv = mapLevels[level].replace(/map/,"div");
document.getElementById(whatdiv).innerHTML = html.join("");
if (mapLevels[level]=="worldmap" && count==mapLevels.length) {
showContent(link);
showNext(aposTitle,mapLevels[level],splitPostID[2]);
count = 0;
}
}
function showNext(nextEntry,category,thisPostID) {
nextEntry = nextEntry.replace(/apostrophe/,"\'");
priorEntry = nextEntry;
var allCategoryClass = getElementsByClass(category);
for(var y=0;y < allCategoryClass.length;y++) {
allCategoryClass[y].style.backgroundColor="#efefef";
allCategoryClass[y].style.color="#387fb5";
}
document.getElementById(thisPostID).style.backgroundColor="#c0c0c0";
document.getElementById(thisPostID).style.color="#000000";
highlightCount++;
var index = mapLevels.indexOf(category);
for (i=index+1; i < mapLevels.length; i++) {
showTitles(i);
}
}
function showContent(postFeedLink) {
document.getElementById("contentdiv").innerHTML = "<img alt='Loading...' src='link-to-your-animated-loading-gif' />";
var content_load=document.createElement('script');
var url=postFeedLink + "?alt=json-in-script&callback=showfeedcontent";
content_load.src=url;
content_load.type="text/javascript";
document.getElementsByTagName('head')[0].appendChild(content_load);
}
function showfeedcontent(root) {
document.getElementById("contentdiv").innerHTML = "";
var entry = root.entry;
var html = ['<p>'];
var content = entry.content.$t;
html.push(content);
document.getElementById("contentdiv").innerHTML = html.join("");
if (document.getElementById("markers")) {
var markers = document.getElementById("markers").innerHTML;
markers = markers.replace(/<br \/>/g,"|");
markers = markers.replace(/<br>/g,"|");
markers = markers.split("|");
var markernum = markers.length;
for (i = 0; i < markernum; i++) {
if (markers[i]!="") {
var onemarker = markers[i].split(",");
var description = onemarker[2]
var point = new GLatLng(onemarker[0],onemarker[1]);
var marker = createMarker(point,description);
map.addOverlay(marker);
}
}
}
if (document.getElementById("routes")) {
var routes = document.getElementById("routes").innerHTML;
routes = routes.replace(/<br \/>/g,"¦");
routes = routes.replace(/<br>/g,"¦");
routes = routes.split("¦");
var routenum = routes.length;
for (i = 0; i < routenum; i++) {
if (routes[i]!="") {
var oneroute = routes[i].split(",");
var encodedPolyline = new GPolyline.fromEncoded({
color: oneroute[0],
weight: oneroute[1],
points: oneroute[3],
levels: oneroute[2],
zoomFactor: 32,
numLevels: 4
});
map.addOverlay(encodedPolyline);
}
}
}
}
function highlightmap (a) {
if (document.getElementById(a).style.backgroundColor=="rgb(192, 192, 192)") {
highlightCount++;
}
else {
document.getElementById(a).style.backgroundColor="#c0c0c0";
document.getElementById(a).style.color="#000000";
highlightCount=0;
}
}
function unhighlightmap (a) {
if (highlightCount == 0) {
document.getElementById(a).style.backgroundColor="#efefef";
document.getElementById(a).style.color="#387fb5";
}
}
// Thanks to Mike at http://www.econym.demon.co.uk/ for his tutorial, which included this bit:
function createMarker(point,html) {
var marker = new GMarker(point);
GEvent.addListener(marker, "click", function() {
marker.openInfoWindowHtml(html);
});
return marker;
}
function getType (a) {
var typeparameter ="";
var maptype = a;
if (maptype == "H") {
typeparameter = "G_HYBRID_MAP"
}
else if (maptype == "S") {
typeparameter = "G_SATELLITE_MAP"
}
else if (maptype == "M") {
typeparameter = "G_NORMAL_MAP"
}
return typeparameter;
}
function delay(a,b) {
map.panTo(new GLatLng(a,b));
}
// Thanks to Dustin Diaz at http://www.dustindiaz.com/ for this great Javascript function
function getElementsByClass(searchClass,node,tag) {
var classElements = new Array();
if ( node == null )
node = document;
if ( tag == null )
tag = '*';
var els = node.getElementsByTagName(tag);
var elsLen = els.length;
var pattern = new RegExp("(^|\\s)"+searchClass+"(\\s|$)");
for (i = 0, j = 0; i < elsLen; i++) {
if ( pattern.test(els[i].className) ) {
classElements[j] = els[i];
j++;
}
}
return classElements;
}
</script>
7. Modify the three widgets you added previously as follows:
a.
        <b:widget id='HTMLa' locked='false' title='Map Controls' type='HTML'>
            <b:includable id='main'>
Add this        <b:if cond='data:blog.url == "http://your-blog-name.blogspot.com/search/label/atravelmap"'>
Remove this            <!-- only display title if it's non-empty -->
Remove this            <b:if cond='data:title != ""'>
Remove this                <h2 class='title'><data:title/></h2>
Remove this            </b:if>
                        <div class='widget-content'>
                            <data:content/>
                        </div>
                        <b:include name='quickedit'/>
                    </b:if>
               </b:includable>
        </b:widget>
b.
        <b:widget id='HTMLb' locked='false' title='Google Map' type='HTML'>
            <b:includable id='main'>
Add this        <b:if cond='data:blog.url == "http://your-blog-name.blogspot.com/search/label/atravelmap"'>
Remove this            <!-- only display title if it's non-empty -->
Remove this            <b:if cond='data:title != ""'>
Remove this                <h2 class='title'><data:title/></h2>
Remove this           </b:if>
                             <div class='widget-content'>
                                 <data:content/>
                             </div>
                             <b:include name='quickedit'/>
                     </b:if>
            </b:includable>
        </b:widget>
c.
        <b:widget id='HTMLc' locked='false' title='Map Link' type='HTML'>
            <b:includable id='main'>
Add this        <b:if cond='data:blog.url == "http://your-blog-name.blogspot.com/search/label/atravelmap"'>
Remove this            <!-- only display title if it's non-empty -->
Remove this            <b:if cond='data:title != ""'>
Remove this                <h2 class='title'><data:title/></h2>
Remove this            </b:if>
                              <div class='widget-content'>
                                <data:content/>
                              </div>
                              <b:include name='quickedit'/>
                    </b:if>
            </b:includable>
        </b:widget>
8. Find the Blog Posts widget:
<b:widget id='Blog1' locked='false' title='Blog Posts' type='Blog'>
Then find the main includable, and the div with an id of "blog-posts":
    <b:includable id='main' var='top'>
       <div id='blog-posts'>
Directly below the div element, add the following:
    <b:if cond='data:blog.url == "http://your-blog-name.blogspot.com/search/label/atravelmap"'>
        <div id="contentdiv">
        </div>
    <b:else />
Just before the closing div tag for the "blog-posts" div, insert the closing if tag, like so:
        </b:if>
    </div>
9. Add the following conditional tags around the "nextprev" include, and the "feedLinks" include, like so:
    <b:if cond='data:blog.url != "http://your-blog-name.blogspot.com/search/label/atravelmap"'>
        <!-- navigation -->
        <b:include name='nextprev'/>

        <!-- feed links -->
        <b:include name='feedLinks'/>
    </b:if>
10. In the "nextprev" includable, find the olderPageUrl conditional statement, and modify the href attribute so it includes the bolded text:
<b:if cond='data:olderPageUrl'>
<a expr:href='data:olderPageUrl + "&updated-min=2000-08-31T00%3A00%3A00-00%3A00"' expr:title='data:olderPageTitle' id='blog-pager-older-link'><data:olderPageTitle/></a>
</b:if>
11. Find the label widget:
<b:widget id='Label1' locked='false' title='Labels' type='Label'>
In the data:labels loop, modify the <li> element so it includes the bolded text:
    <b:loop values='data:labels' var='label'>
        <li expr:id='data:label.name'>
            <b:if cond='data:blog.url == data:label.url'>
                <data:label.name/>
            <b:else/>
                <a expr:href='data:label.url'><data:label.name/></a>
            </b:if>
            (<data:label.count/>)
        </li>
    </b:loop>
12. Find the blog archive widget:
<b:widget id='BlogArchive1' locked='false' title='Blog Archive' type='BlogArchive'>
Assuming you are using the hierarchy view for your archive, find the "interval" includable, and add the conditional tags as follows:
    <b:includable id='interval' var='intervalData'>
        <b:loop values='data:intervalData' var='i'>
            <b:if cond='data:i.name != "1985"'>
                <ul>
                    <li expr:class='"archivedate " + data:i.expclass'>
                        <b:include data='i' name='toggle'/>
                        <a class='post-count-link' expr:href='data:i.url'><data:i.name/></a>
                        (<span class='post-count'><data:i.post-count/></span>)
                        <b:if cond='data:i.data'>
                            <b:include data='i.data' name='interval'/>
                        </b:if>
                        <b:if cond='data:i.posts'>
                            <b:include data='i.posts' name='posts'/>
                        </b:if>
                    </li>
                </ul>
            </b:if>
        </b:loop>
    </b:includable>
If you're using the flat view or drop-down menu, I'm not sure how to easily block out an entire year.
13. Add the following to the very last widget on your template (for me, this is the Profile widget). This should be inside the main includable:
<b:includable id='main'>
<b:if cond='data:blog.url == "http://your-blog-name.blogspot.com/search/label/atravelmap"'>
 <script type="text/javascript">
  setTimeout("loadMapFeeds()",200);
 </script>
</b:if>
14. Save the template changes, and upload the template to Blogger. Go to the Page Layout view, and add the following data to your HTML widgets:
a. Map Control
    <a href="http://your-blog-name.blogspot.com/">back home</a>
    <p>
        <ul>
            <li>
                <div id="worlddiv">
                </div>
            </li>
            <li><span class="travelsection">country:</span>
                        <div id="countrydiv">
                </div>
            </li>
            <li><span class="travelsection">region:</span>
                <div id="regiondiv">
                </div>
            </li>
            <li><span class="travelsection">city:</span>
                <div id="citydiv">
                </div>
            </li>
            <li><span class="travelsection">place:</span>
        <div id="placediv">


                </div>
            </li>
        </ul>
    </p>
b. Google Maps
    <script src="http://maps.google.com/maps?file=api&v=2&key=YOUR-GOOGLE-MAP-KEY" type="text/javascript">
    </script>

    <div id="map" style="width: 100%; height: 400px"></div>

    <noscript>JavaScript must be enabled for Google Maps.  JavaScript is either disabled or not supported by your browser.
    </noscript>

    <script type="text/javascript">
        if (GBrowserIsCompatible()) {
            // Display the map, with some controls and set the initial location
            var map = new GMap2(document.getElementById("map"));
            map.addControl(new GLargeMapControl());
            map.addControl(new GMapTypeControl());
            map.setCenter(new GLatLng(35.704857,-6.926808),1,G_SATELLITE_MAP);
            map.enableContinuousZoom();
        }
        else {
            alert("The Google Maps API is not compatible with this browser");
        }
    </script>
c. Map Link
<!--[if IE]>
<script type="text/javascript">
function iealert() {
alert("Internet Explorer does not support this function. Get the better browser. Get Firefox at http://www.mozilla.com");
}
</script>
<p>
<a id="travellink" href="javascript:void(0);" onclick="javascript:iealert();">places I've been</a>
</p>
<![endif]-->
<![if !ie]>
<p>
<a id="travellink" href="http://your-blog-name.blogspot.com/search/label/atravelmap">places I've been</a>
</p>
<![endif]></![endif]></
